Planning Street Photography in a New City
When I'm heading somewhere new with my camera, I don't want to over-plan—half the magic of street photography is stumbling onto unexpected moments. But I also don't want to waste golden hour wandering aimlessly when I could be shooting in perfect light.
Here's my approach: I research just enough to know where I need to be and what the city offers, then stay loose when I'm actually out shooting.
Match neighborhoods to your vision. Every city has different flavors, and knowing what you're after makes research so much easier. Are you drawn to gritty industrial areas or polished modern districts? Historic cobblestone streets or glass-and-steel architecture? Chaotic markets or quiet residential blocks? I'll usually ask Claude something like, "What neighborhoods in Lisbon have old-world character versus modern energy?" or "Where in Tokyo can I find both busy street life and quieter traditional areas?" This helps me map out a few different zones that match my shooting style.
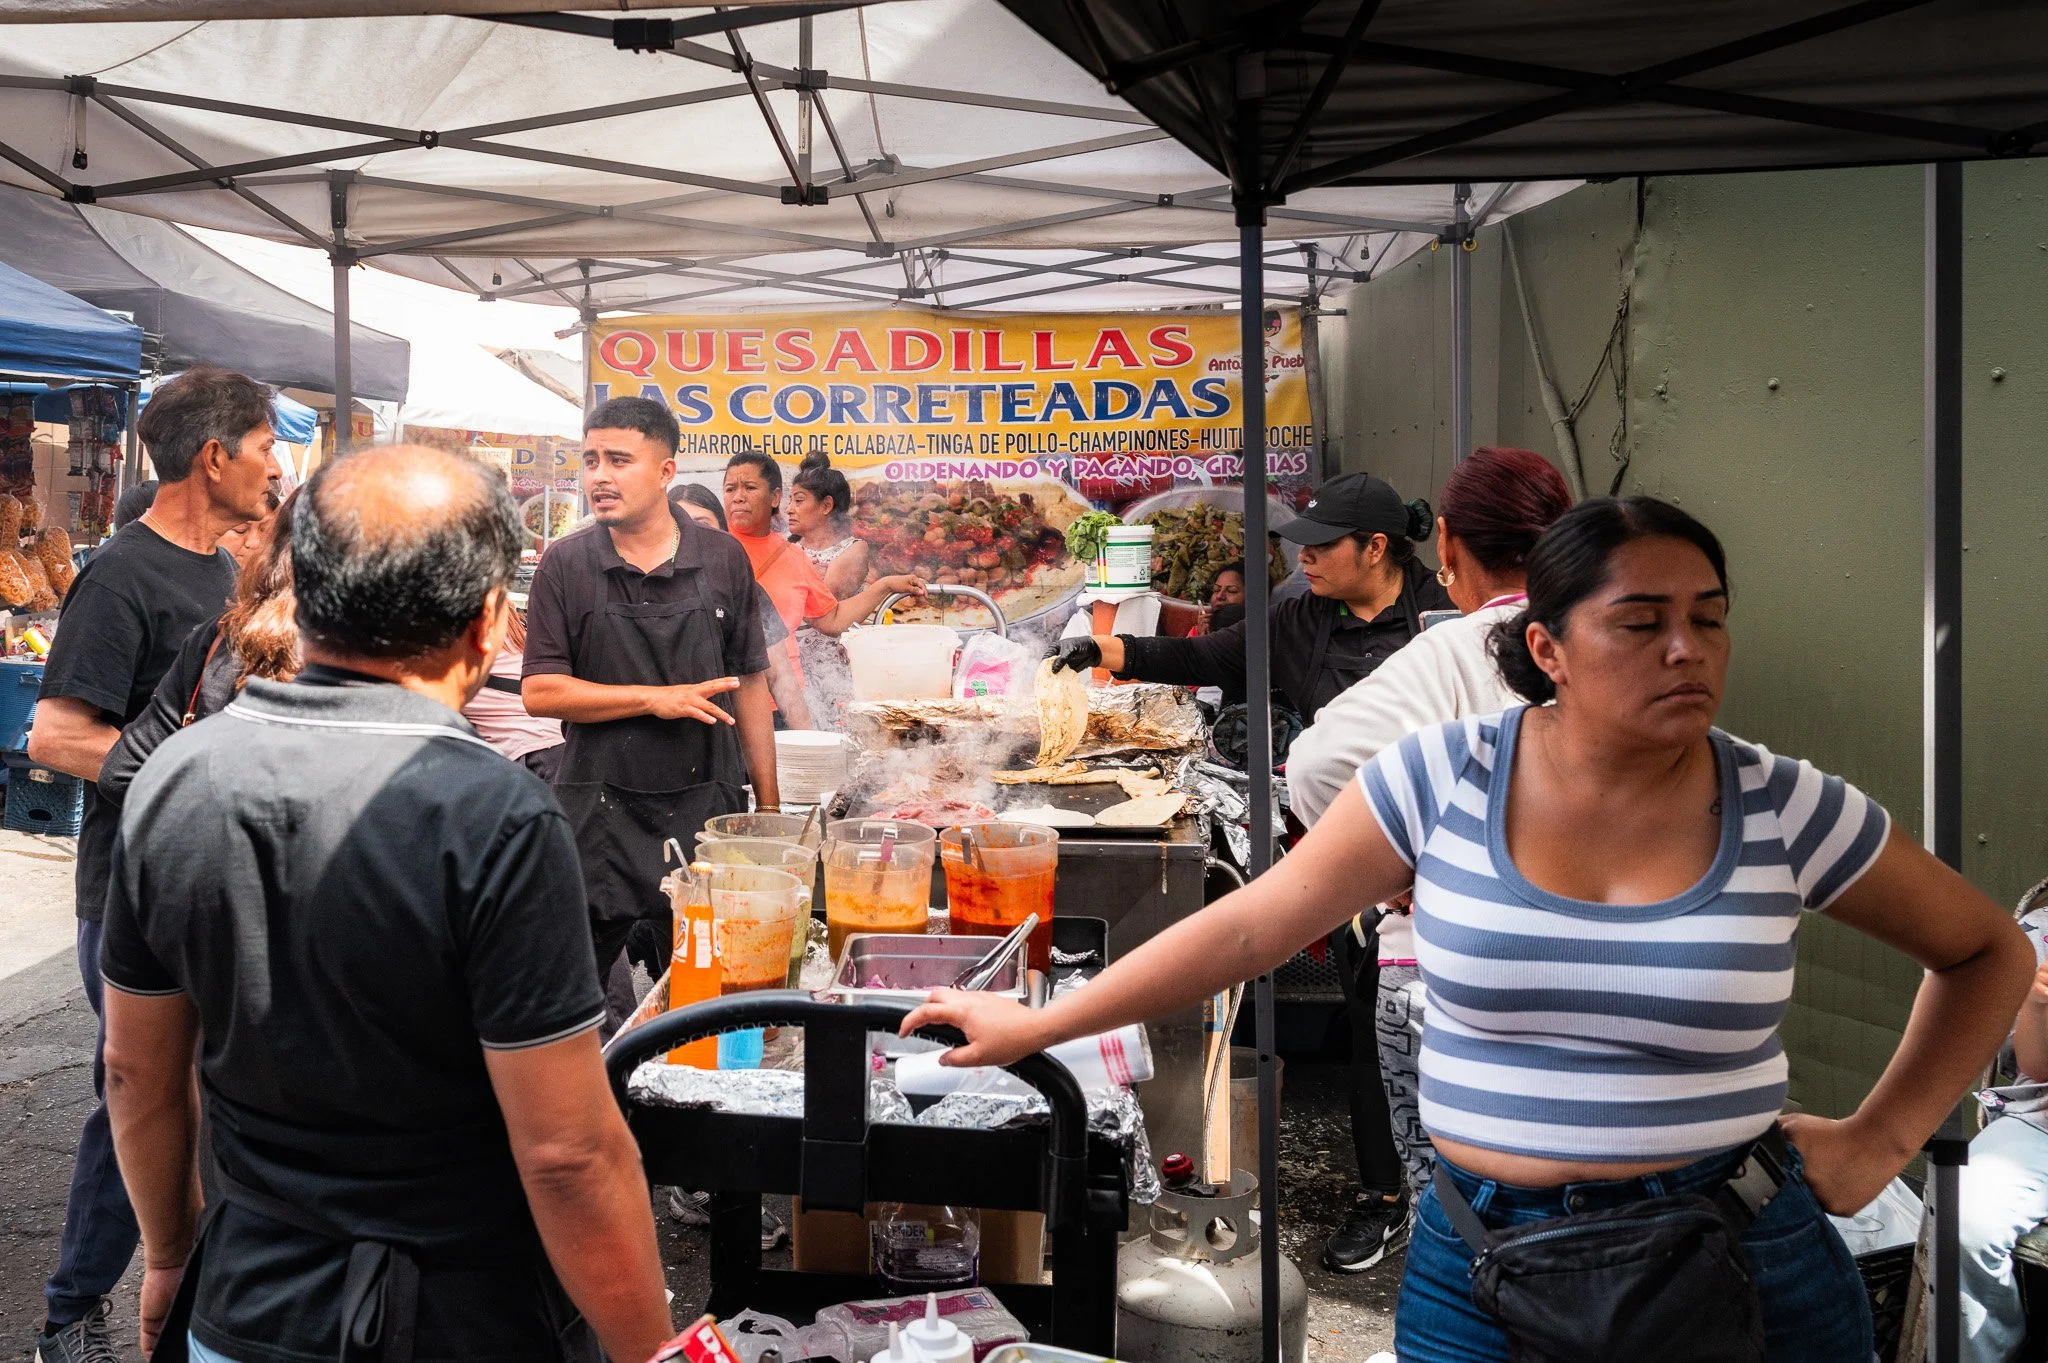
The Toy District in Los Angeles
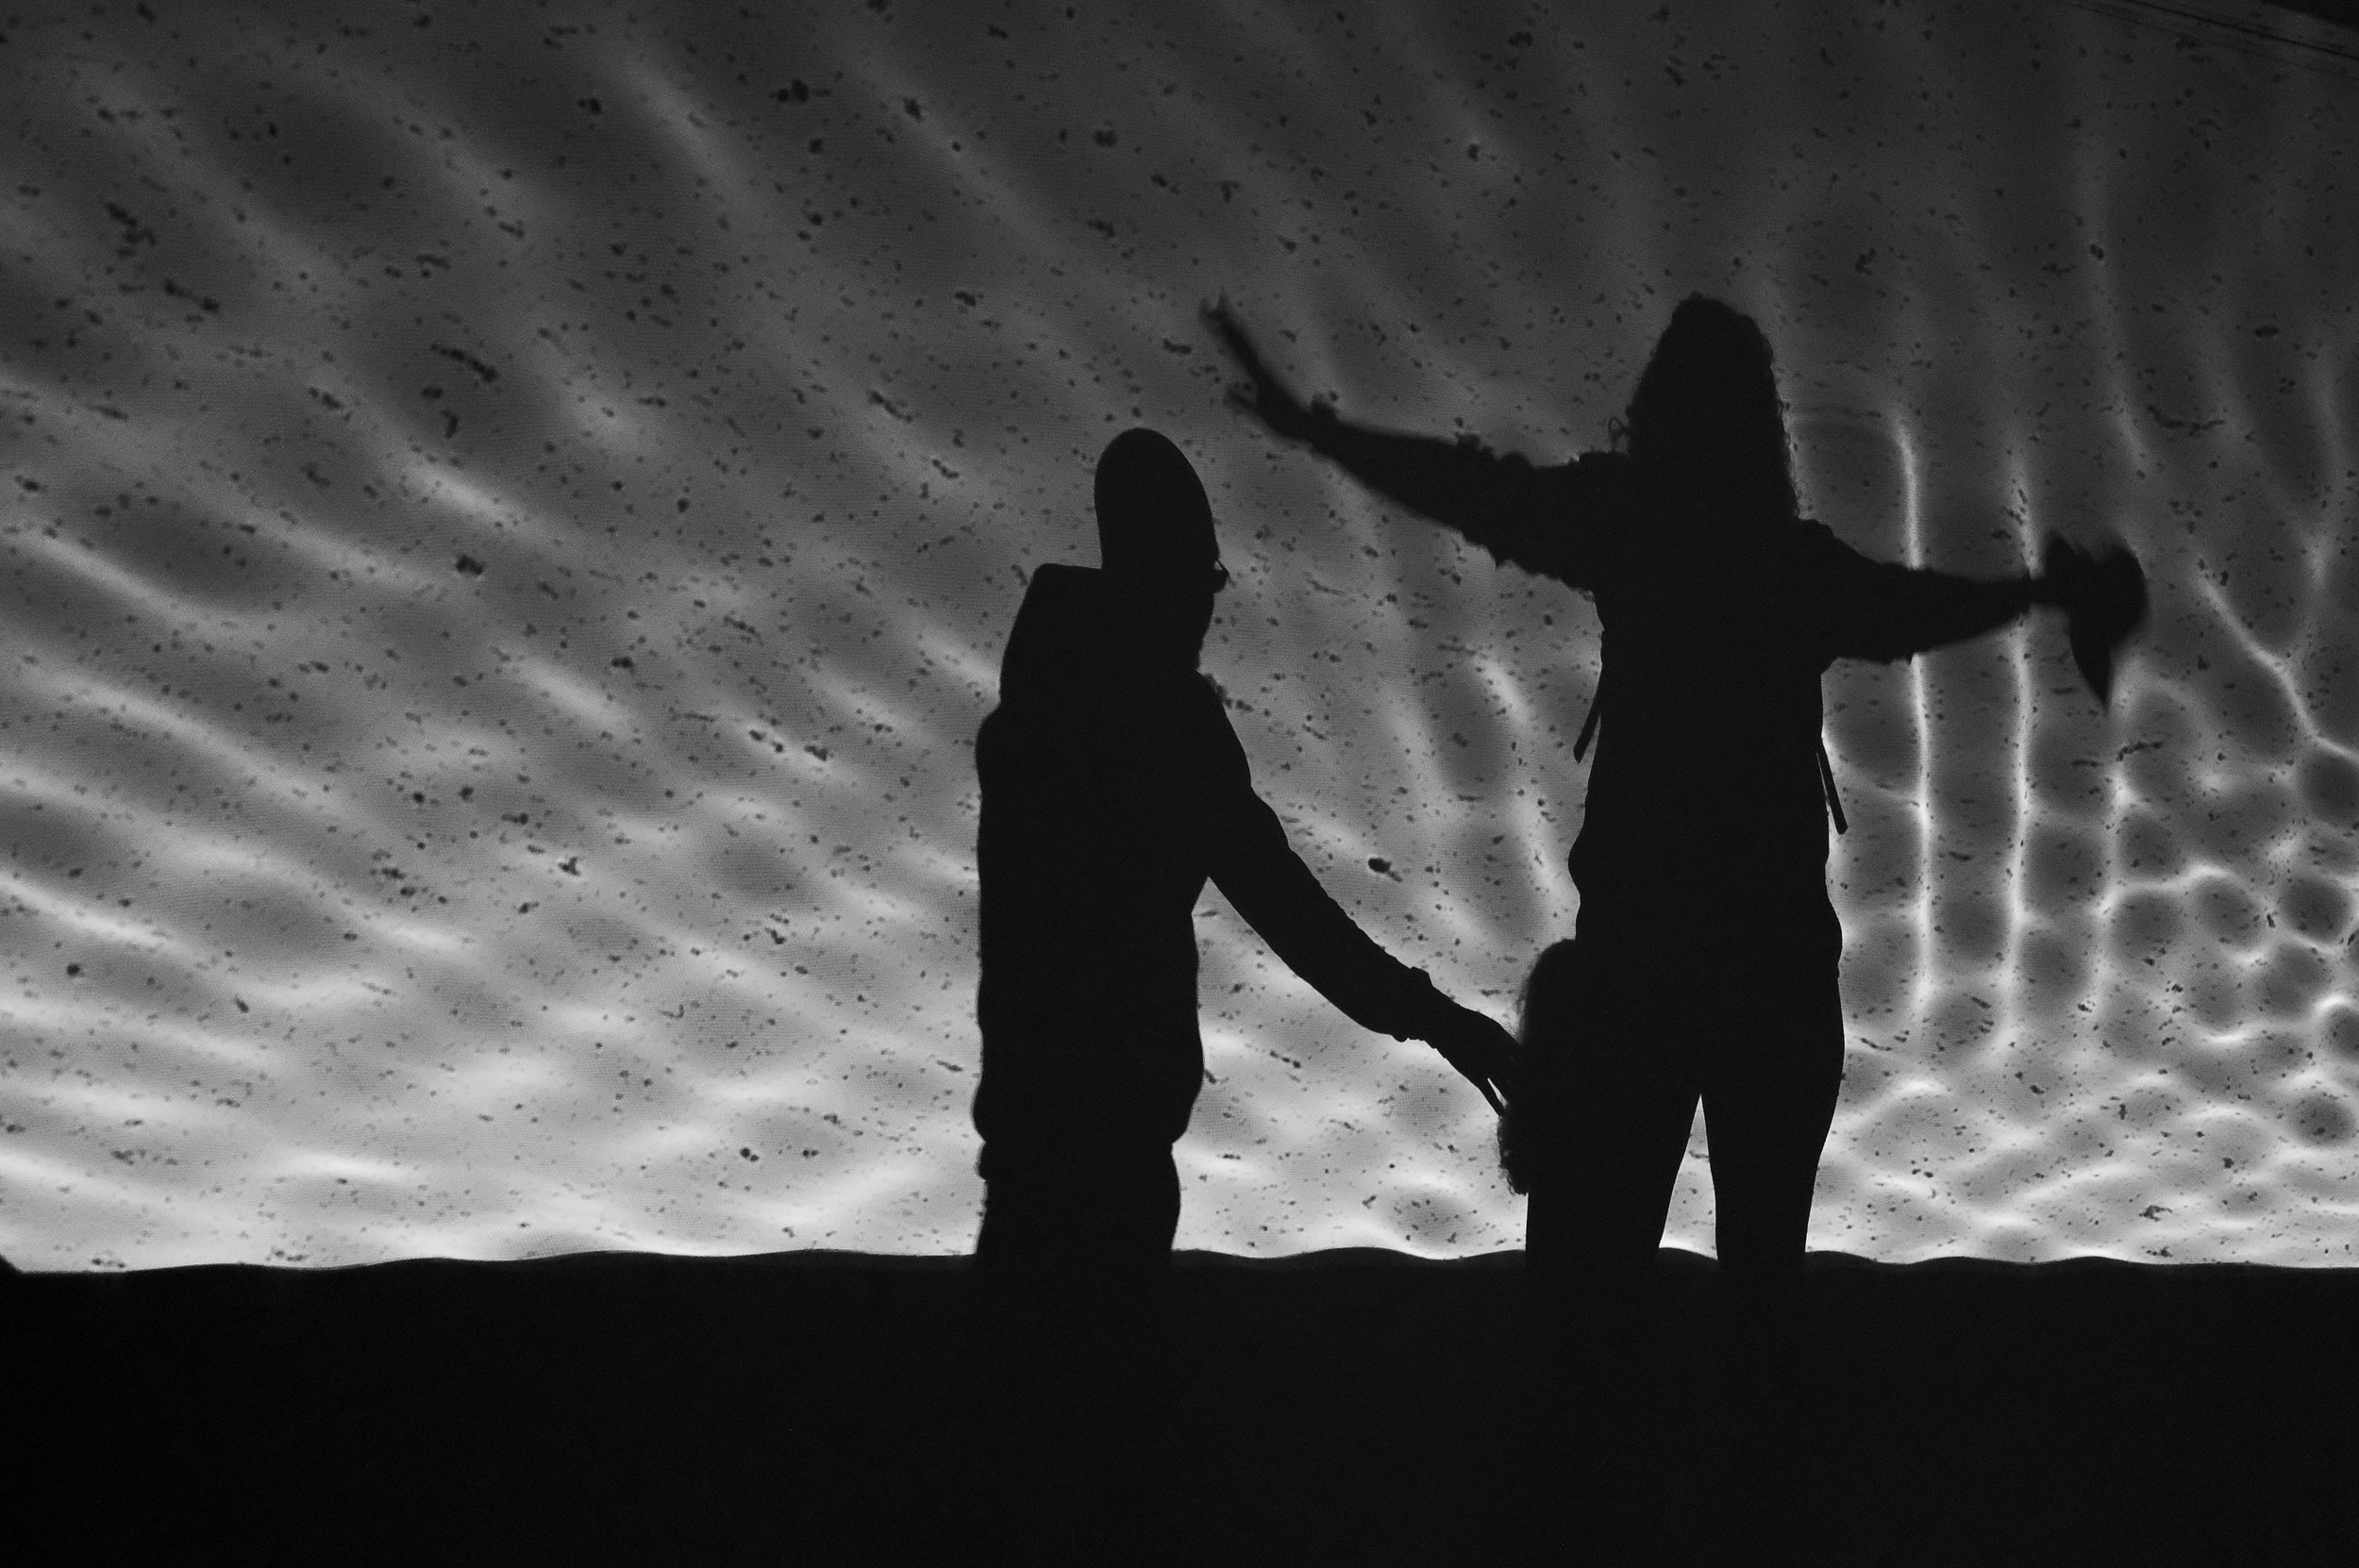
The Hirshhorn Museum in Washington DC
Think about golden hour strategically. Once I know my target neighborhoods, I figure out lighting. Which streets face east for sunrise? Where should I position myself at sunset? Google Maps and street view help, but Claude can save you time: "Which side of Barcelona's Gothic Quarter gets the best morning light?" The goal is knowing where to be when the light is magic, not scripting every shot.
Choose your base wisely. I like staying somewhere central to my main shooting areas—ideally walkable to at least two different neighborhood types. This gives you flexibility and means you're not burning energy on long commutes when you could be shooting. Ask about transit connections too, especially if you want to catch early morning light across town.
Plan your breaks. Street photography is exhausting, and you need good spots to recharge. I always research a few cafes, bakeries, or brewpubs in my target areas before I go. Nothing fancy—just places where I can sit, review images, and watch people. Claude's great for this: "What's a good coffee spot in Rome's Trastevere where I can take a break between shooting?" These become part of the rhythm of your day.
I used these techniques to plan my trip to New York for Lunar New Year and Los Angles for a workshop. Hopefully they help you too. Do you have a process for planning street photography trip? Leave it in the comments.
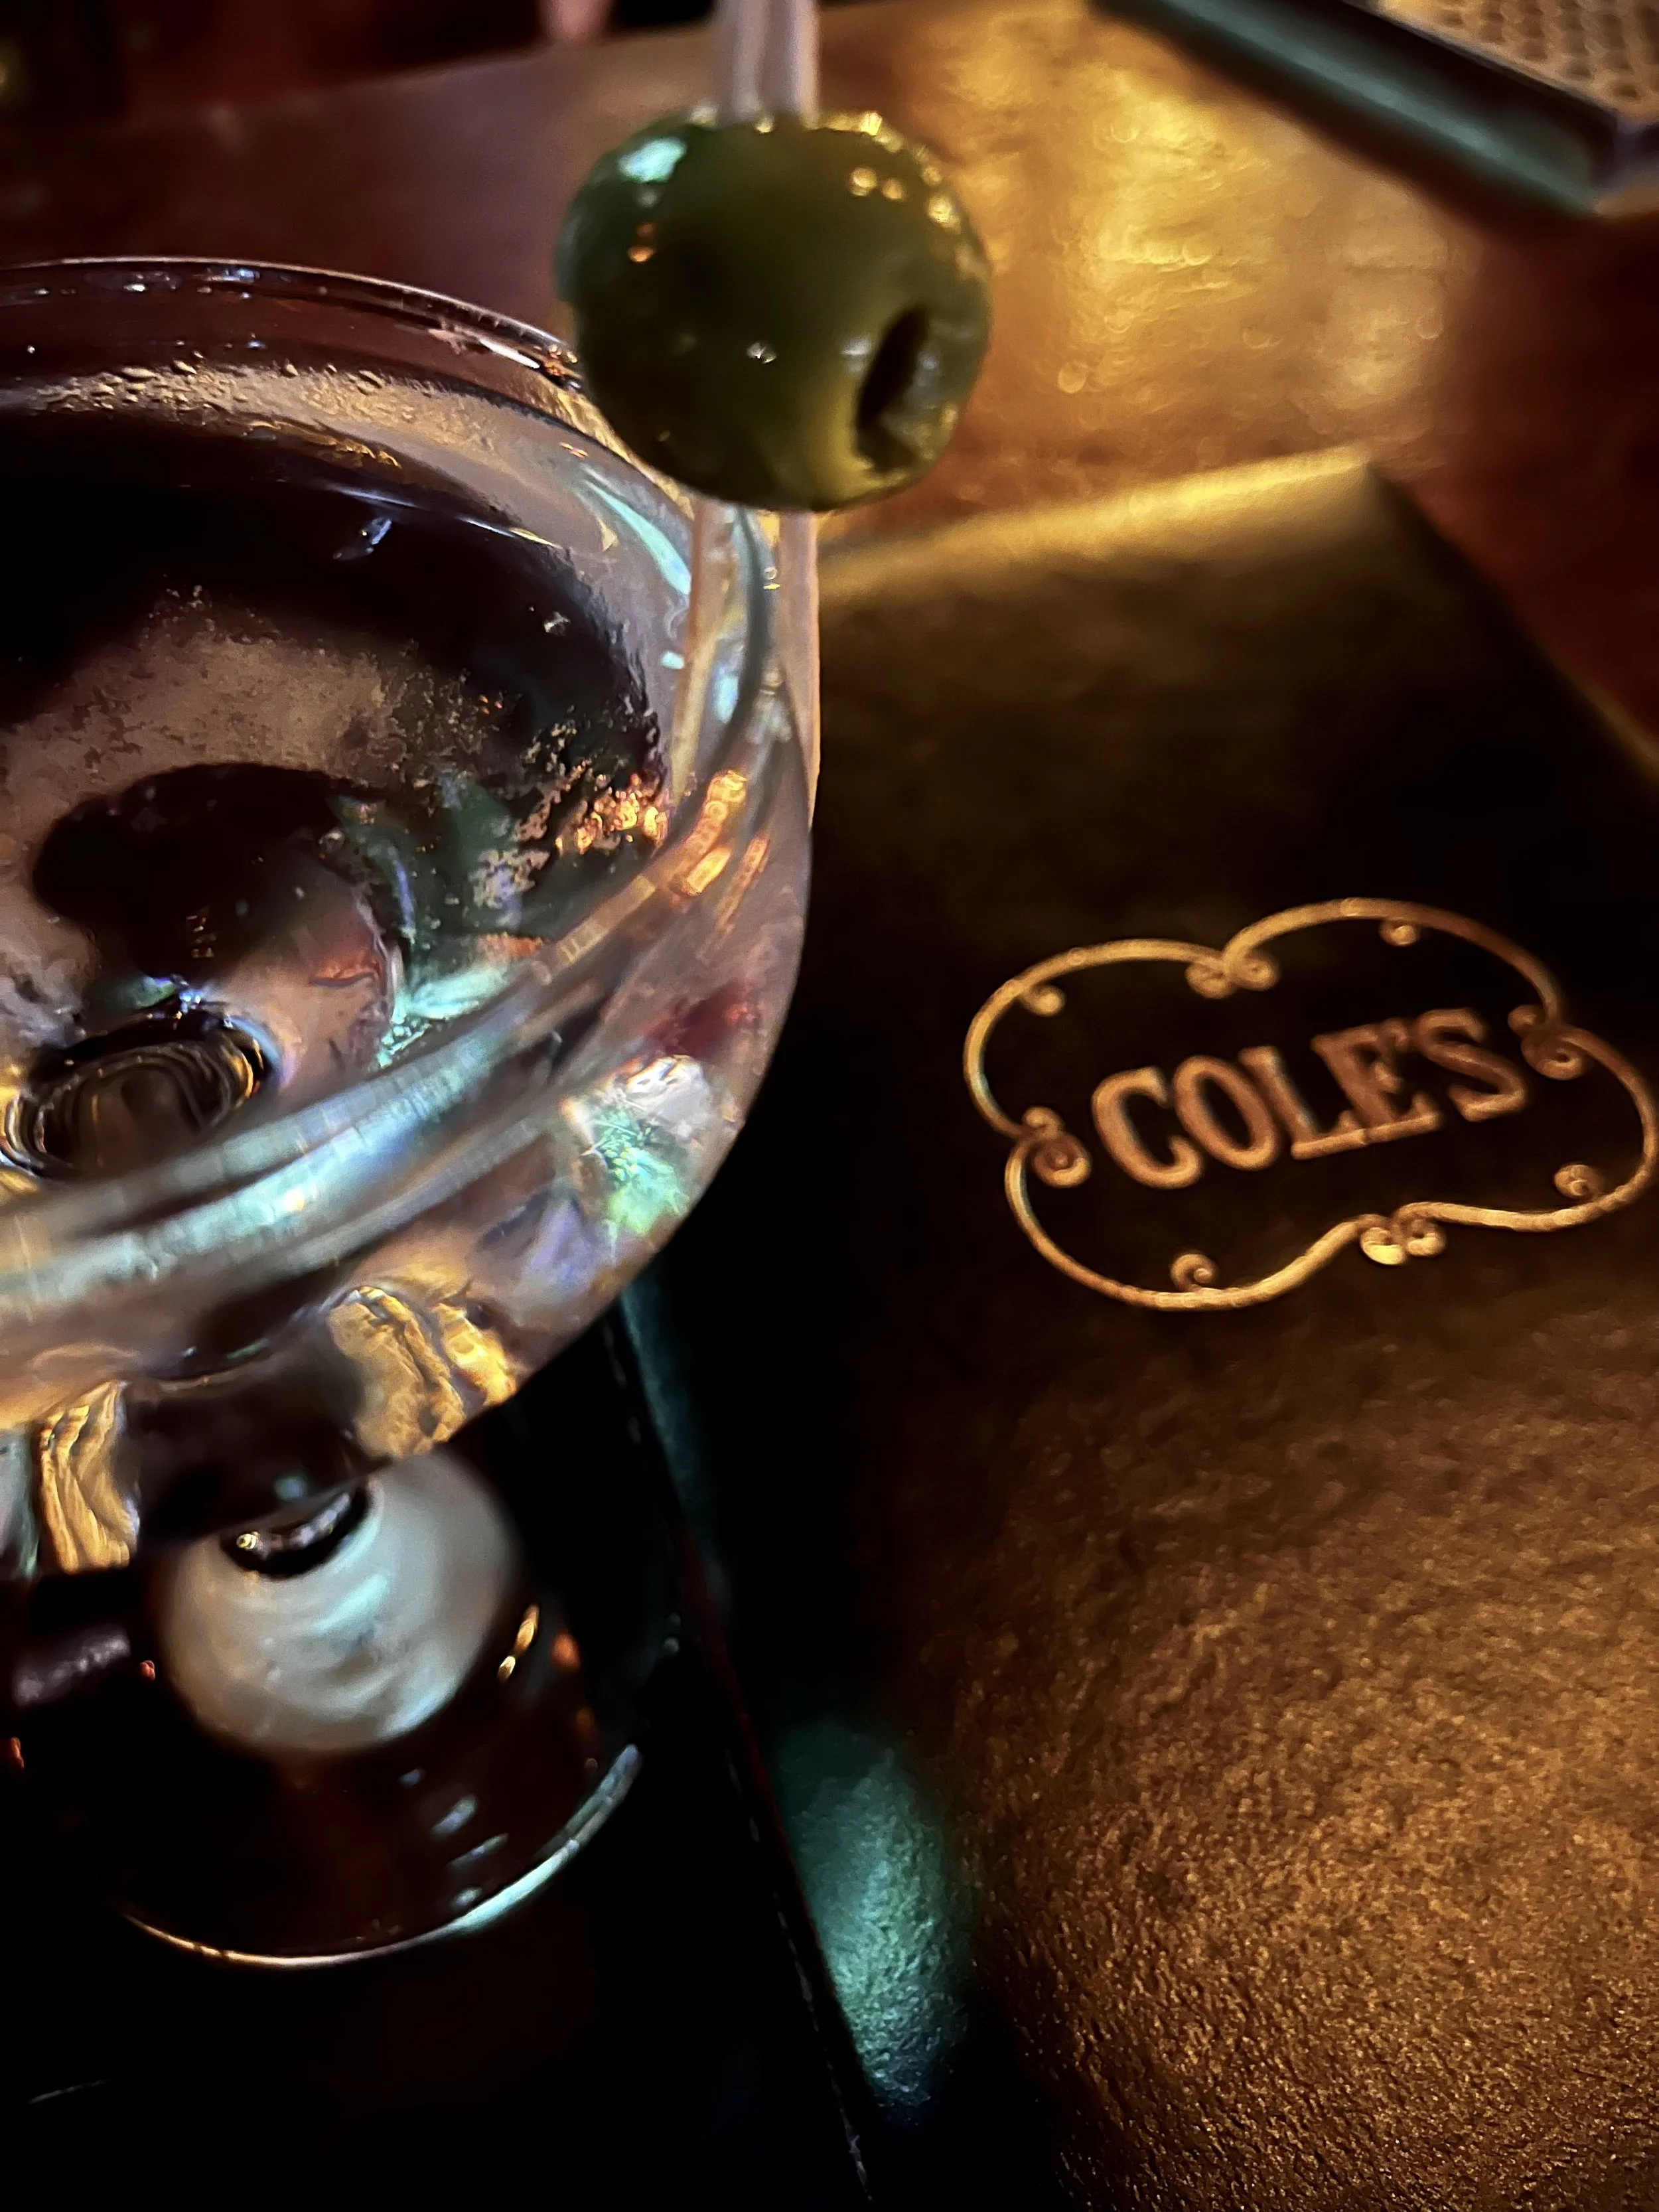
A Martini at Cole’s in Los Angeles
Have a backup plan for bad weather. Rain and flat gray skies happen. Before I travel, I identify a few indoor locations that still offer street photography opportunities—metro stations, covered markets, train halls, museum atriums, shopping arcades. Some of my favorite shots have come from these Plan B moments. The key is knowing where to pivot when the weather doesn't cooperate.
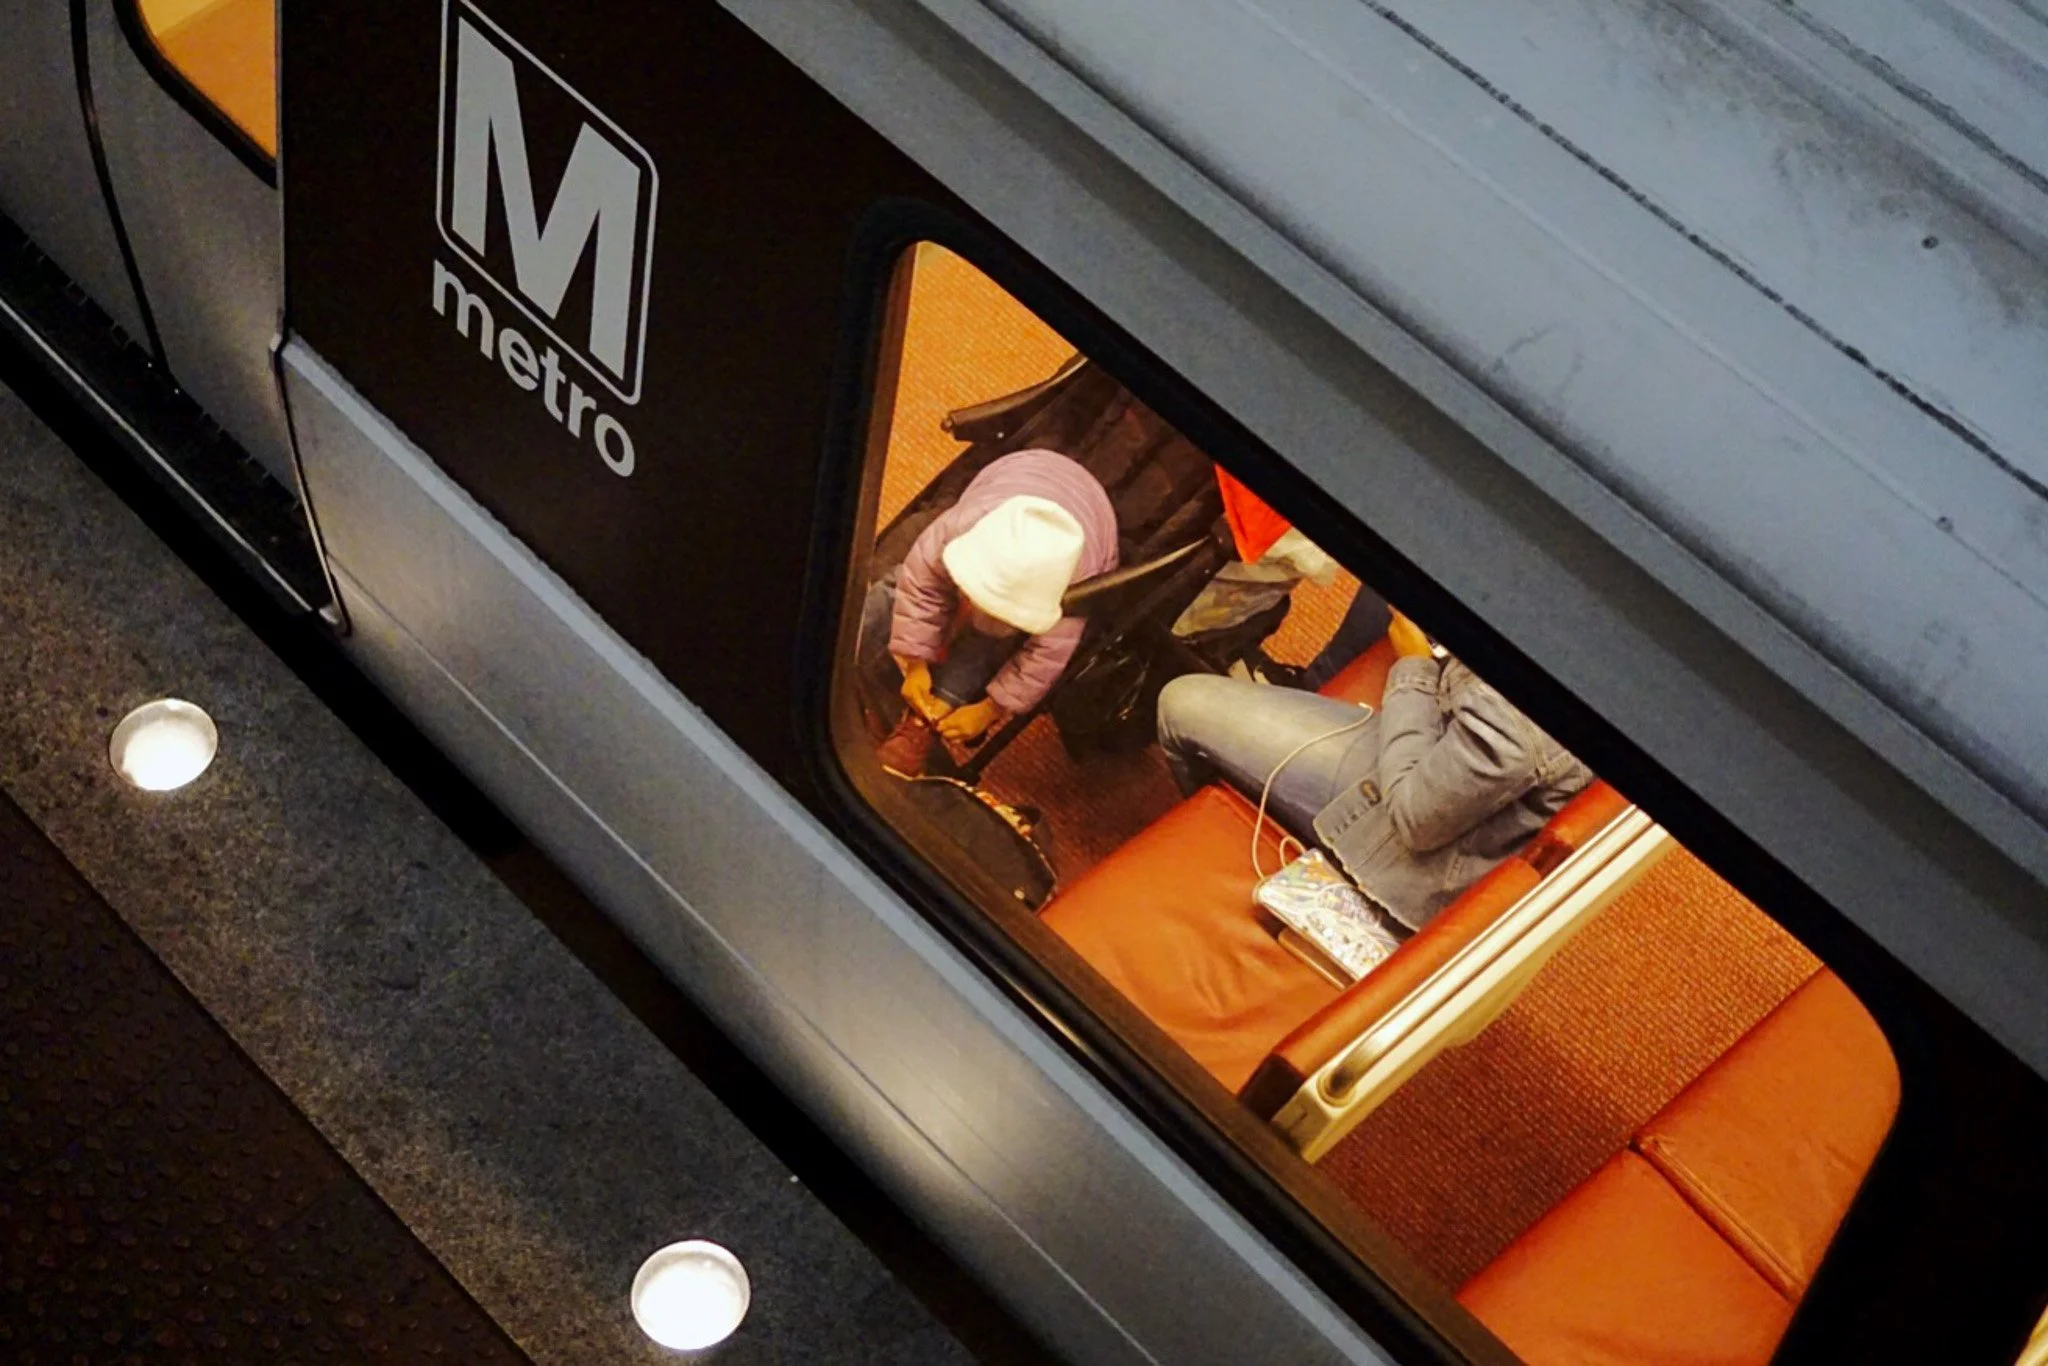
The Washington DC Metro
Connect with the local scene. Most cities have street photography collectives, Instagram communities, or regular photo walks. A quick search for "[city name] street photography collective" or asking Claude can point you to groups worth reaching out to. Even if you can't join a scheduled walk, connecting with local photographers can lead to insider tips about locations, timing, or events you'd never find in a guidebook.
The beauty of this approach is that you show up informed but not rigid. You know where the light will be, what neighborhoods speak to you, where to rest, and who to connect with—but you're still free to chase whatever catches your eye in the moment. That's when street photography really comes alive.